Sunday, July 01, 2007

Gluten-Free Flour Mixes, Amy's Favorite Flour Mixes

It is surprising to me the number of people I meet who are either allergic to wheat or are following a gluten free diet. Most recently, I reconnected with a cousin who is wheat-free. This posting is for you, Matt.

The best tasting gluten-free results I've achieved are made with a flour mixture that contains chestnut flour from Allen Creek Farm in Oregon. If you don't have chestnut flour on hand, try the millet mix posted below. To begin experimenting, follow your favorite gluten-free recipe using these mixes in place of the flours listed. I usually add 1 teaspoon of xanthan gum to approximately 2 cups of flour mix.

Since gluten-free baking usually requires several different gluten free flours to be mixed together in one recipe, I've found it easiest to make a large batch of flour mix once, then each time I want to bake, I use the mix instead of measuring out all the individual gluten-free flours.

Amy's Gluten-Free Chestnut Flour Mix
3 cups chestnut flour
3 cups brown rice flour
1/2 cup tapioca flour

Amy's Gluten-Free Rice Flour Mix
3 cups brown rice flour
1 1/4 cups millet flour
3/4 cup tapioca flour

Monday, April 09, 2007

Chocolate Drop Oatmeal Cookies, Wheat-Free


Give your body a break -- try baking with flours other than wheat! This recipe contains barley, so not for the gluten-free among you.

1 cup unsalted butter, room temperature
1 cup brown sugar, packed firmly into cup
1/2 cup unrefined cane sugar
2 eggs
1 teaspoon vanilla

1 cup barley flour
1 cup oat flour
1 teaspoon baking powder
1 teaspoon baking soda
1 teaspoon kosher salt

2 cups whole oats
1/2 cup raisins
1/2 - 1 cup bittersweet chocolate drops (Dagoba 73% drops are great!)

Mix the usual cookie way: cream butter and sugars. Add eggs and vanilla. In separate bowl, whisk flours and leavening -- this step is important with oat flour, as it tends to clump. Add flour mixture and whole oats to creamed butter and sugar mixture, mix to combine. Stir in raisins and chocolate drops.

You need to chill this dough for at least 1 hour before forming and baking. Line a cookie sheet pan with a silpat liner or with a sheet of baking parchment paper. For each cookie, shape 1 tablespoon of dough into a ball, put it on the lined sheet pan and flatten slightly with your hand.

Bake 350 degrees for 10 minutes or until cookies are lightly browned. Let cool on sheet pan for 5 minutes, then move cookies to a cooling rack.

Makes approximately 6 dozen cookies.

Thursday, March 29, 2007

Is it a pizza? Whole Wheat & Barley Pizza Dough


It wasn't perfect. Making pizzas at home without a peel...But it was fun and they were tasty!

...and beautiful, at least before the bake. Four 12 inch rounds of whole grain yeasted dough topped with a rich tomato sauce, some fresh mozzarella, some basil, all sitting so nicely on the counter.

Now, how to get them to the blazing hot pizza stone in the oven? Hmmm. This is where I realized I should have formed the pizza ON the peel, that I don't own. Oh well, easy to remedy: For attempt #1 I grabbed my biggest bbq flipper in one hand, my 5-inch wide mini-peel I bought on a trip to France (more decorative than useful, as it turns out) in the other and moved fast hoping for the best. Not so lucky. This attempt resulted in a baguette shaped "calzone" of pizza filling mostly making its way to the pizza stone. While gearing up to sling #2 in the same manner, I heard a voice of reason from somewhere over to my right, "Stop. Let's think for a minute." Oh, the magic words every fiber in my Type-A body longs to hear during such heights of adrenaline surge...!

The remaining little pizzas had a better chance of baking off into recognizeable pizza shapes after we used almost every available large, flat-surfaced item in the kitchen as a peel stand-in. The best improvised peel was an upside down cookie sheet pan. We formed the pizza (*) on the backside of the cookie sheet sprinkled with a little corn meal. This pan topped w/pizza we then placed into the oven for a partial bake; just until the crust hardened up enough to move it from the metal pan directly to the pizza stone for the last few minutes. (If you have a real, pizza-sized peel, congratulations! Use it. It is worth the storage inconvenience.)

Whole Wheat and Barley Flour Pizza Dough
1 envelope active dry yeast
1 3/4 cups warm water (90 - 105 degrees)
1/2 teaspoon sugar
3 cups whole wheat pastry flour
1 cup barley flour
2 1/2 teaspoons kosher salt

In a large bowl (I use the mixing bowl from my Kitchen Aid stand mixer), mix yeast with 1/2 cup of the warm water and sugar and let stand until foamy, about 5 minutes. Add remaining 1 1/4 cups water, the flours and salt. Mix with paddle until soft dough forms. Switch out paddle for dough hook and mix about 5 - 8 minutes, adding a little more barley flour to make a soft, not too wet dough. (Wet dough is sticky dough. Sticky dough doughn't really slide onto the pizza stone.)

Transfer dough to a lightly-floured work surface and knead a few times to assess moisture content (adding a little more barley flour, as needed) then form into ball shape and place in a lightly oiled bowl. Cover with plastic wrap and put in the fridge overnight. (Punch down dough in the morning if you are going to leave it in the fridge until dinner time the next day.)

This amount of dough makes 4, 12 inch pizzas.

Form and bake on pizza stone, 475 degree oven for about 12 minutes or until bottom of crust in nicely browned and cheese is bubbly to your satisfaction. Enjoy!

Sunday, March 04, 2007

Amy's Favorite Pancakes -- Oat Flour & Oat Bran Pancakes


"Write that one down!" exclaimed Christopher, my official pancake taste-tester. I'm always improvising w/the Saturday morning pancake ritual and hit on this success back in the fall (...as the ghosts will attest, I'm a bit behind on my blogging). Of course, you know you can free-form just about any shape on the pancake griddle. Clover-leaves anyone? (It's March, after all!) Have fun and enjoy the delicious results.

1 1/2 - 2 cups buttermilk
4 Tablespoons unsalted butter, melted
2 eggs
3 Tablespoons sucanat (or brown sugar)

1 cup unbleached all-purpose wheat flour
1/2 cup oat flour
1/2 cup oat bran
1 teaspoon baking soda
1 teaspoon baking powder
1 teaspoon kosher salt or sea salt (fine grained)

Pour 1 1/2 cups buttermilk into bowl, or if you have a large enough measuring cup, use it as the bowl and proceed. Add eggs, melted butter (I pop a little bowl into the microwave for about 25 seconds) and sucanat (or sugar), mix thoroughly with whisk to blend.

In separate bowl, combine flours, oat bran, leavenings and salt. (You can make this w/o the baking powder, but I like the added loft it brings.)

Add buttermilk mixture to the flour mixture and mix to blend with a wooden spoon or rubber spatula. Do not overmix or you will develop too much gluten and the pancakes will be chewy -- not a good thing.

Add as much of the remaining 1/2 cup buttermilk to achieve the consistency you prefer.

Ladle small amounts (like 2 Tablespoons per pancake) onto your pancake griddle and cook until small bubbles form on the top of the pancakes and the undersides are light brown. Flip and cook a couple more minutes until that side is nicely brown too. Serve up onto warm plates with a little butter and pure maple syrup (and bacon, if you wish!)

Enjoy!
(Serves 4 generously. Save any leftovers -- they are great warmed up in the toaster on another day.)

Saturday, September 23, 2006

Cupcake Contest at the San Mateo County Fair (aka Sushi Cupcakes?!)


Sibby Thomsen of Sibby's Cupcakery sponsored the "Baby Cakes" contest at the fair this year. We received some beautiful and creative entries! It was difficult to pick a winner, but the decorating of these "sushi" cakes won us over.

Monday, August 14, 2006

Baking at the San Mateo County Fair

Chocolate Obsession. That was the theme of the baking contest sponsored by Guittard Chocolate Company yesterday, at the San Mateo County Fair. I'm lucky enough to know Bill, the man behind all things cooking at the fair, and jumped at the chance to help judge the baking contests again this year.

Here he is with another happy baker and fellow judge, Mimi...

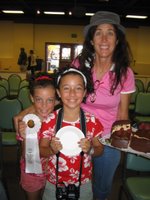
There were about 20 entries, including chocolate orange scones, several bittersweet chocolate tortes, and the winner, a sublime chocolate-coated key lime frozen confection, "Triple Chocolate Chillers". Third place went to these cuties with their chocolate and peanut butter mousse torte. Yum!


More fun ahead in the next few days, including one of my favorite contests, Biscotti, and Sibby's Cupcakery's "Baby Cakes" cupcake contest on Thursday.

Sunday, July 23, 2006

Hazelnuts...love 'em, hate 'em


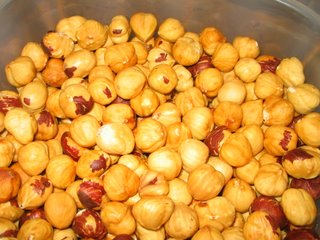
I love the taste of a nicely roasted and skinned hazelnut, but are they worth the trouble? My flour sack, "baking only" dishtowels need to be hidden from prying eyes, lest they think I am not doing my laundry often enough. Not even Oxyclean can get out the telltale purpley-brown rub. Since I want to use hazelnuts in one of my biscotti flavors, when I happened upon a new technique for skinning the nuts, and in my Baking with Julia, no less, I was compelled to try it.

Sounds great...blanch the hazelnuts in a boiling baking soda water bath until the water turns black, then drain the nuts and off pop the skins. Ha! Post bath, you are stuck with a colander full of hot nuts that you have to individually fondle to remove from the soggy skin. Then you have a soggy nut that tastes, well, soggy. Roasting in the oven didn't perk them up either. Eew. Waste of a good batch of nuts.

Seems like the only way is to roast, then rub in a towel to get off most of the skins. It does work nicely, and I do love the quiet, sizzling sound the nuts make. Perhaps it is all ok. Maybe that once-white towel loves her job.